We can use the Windows and Office Deployment Lab Kit I posted about previously to try out the technical preview.
This post will start the same as that first SCCM lab set up blog post. However this environment will not be as pre-configured as an out-of-box Deployment Lab Kit.
The Requirements
-
Set up a host device - For this lab, I’m using a Windows 10 Pro workstation with an old i7 CPU, 16GB of RAM, and a secondary 500GB hard drive.
-
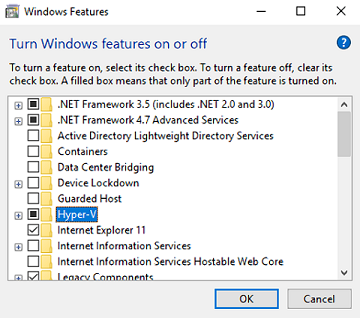
Enable Hyper-V - If Hyper-V is not yet installed, open Turn Windows features on or off, check Hyper-V, and click OK. Reboot.
-
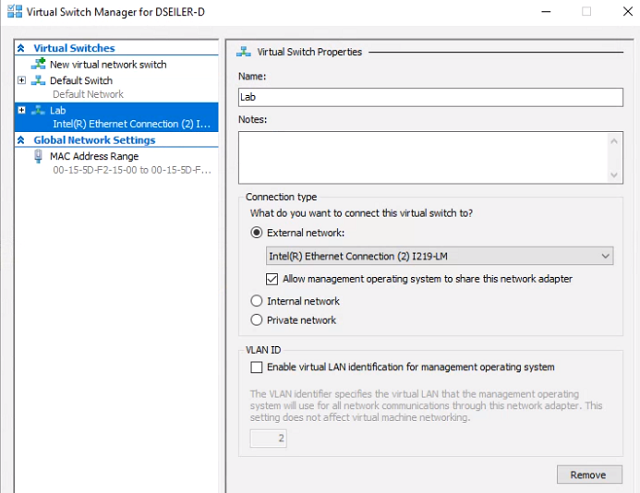
Configure networking - Launch Hyper-V as administrator, and open the Virtual Switch Manager. Under Virtual Switches, select New virtual network switch. Select External and click Create Virtual Switch. Name it Lab and and leave everything else default. Click OK, and if you are prompted with a warning, click OK again.
The Setup
-
Download the kit from the link above. It has the virtual machines and step-by-step documentation on how to configure services.
-
Extract the lab zip file, preferably to a drive that is large and fast.
-
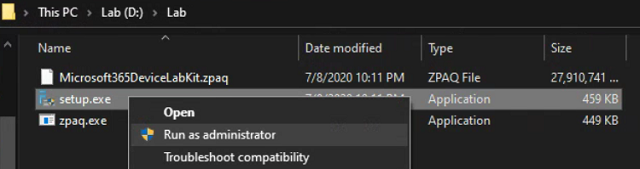
Install - Right click Setup.exe and run as administrator. If prompted by SmartScreen, click More Info and then click Run anyway.
-
Setup Wizard - Click Next all the way through to the end. It will import all the VMs into Hyper-V.
-
Configure VM Settings - You should see HYD-DC1 and HYD-GW1 already running. Shut them down. We won’t be using HYD-GW1 again.
-
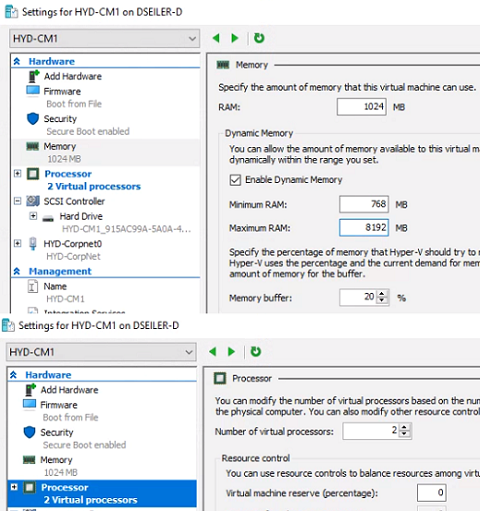
Domain Controller - Right click HYD-DC1 and select Settings. Set Maximum Memory to 2048MB and leave Enable Dynamic Memory checked. Set CPU to one virtual processor.
-
SCCM Server - Right click HYD-CM1 and select Settings. Leave memory settings at default. Set CPU to two virtual processors.
NAT Networking
Note: We will NOT be using the external virtual switch called Lab from Step 3 of the Requirements section. It was only necessary so that Setup.exe from the Setup section would run.
-
NAT Networking - We’ll use Ami Casto’s NAT network script instead of the Internet Gateway (HYD-GW1) to make the lab simpler. You can learn more about NAT networking here.
-
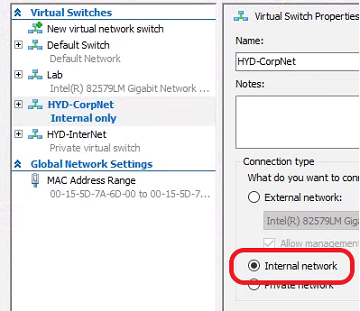
Prepare the Virtual Switch - The Deployment Lab Kit creates it’s own private network switch, so we need to make it an Internal one to work with Ami’s script. In Hyper-V click Virtual Switch Manager. Click on HYD-CorpNet. Select Internal network and click OK.
- Customize the script - On the host system, launch Windows Powershell ISE as Administrator. Copy and paste the following code into the top script pane. This is an edited version of Ami’s code customized for our Microsoft lab. Hit F5 to run it.
New-NetIPAddress –IPAddress 10.0.0.254 -PrefixLength 24 -InterfaceAlias "vEthernet (HYD-CorpNet)" New-NetNat –Name HYD-CorpNetNATNetwork –InternalIPInterfaceAddressPrefix 10.0.0.0/24 - We now have our host Windows 10 OS performing NAT on the internal virtual switch HYD-CorpNet. Our VMs are already pointing to it as the default gateway.
The Test
-
Power on HYD-DC1 and wait for the log on screen. This is so our servers and workstations can talk to Active Directory.
-
Power on HYD-CM1 and log in. The passwords for the local administrator accounts and for CORP\LabAdmin is P@ssw0rd
-
Confirm the SCCM server has internet access by launching command prompt and pinging 8.8.8.8.
Installing the SCCM Technical Preview
-
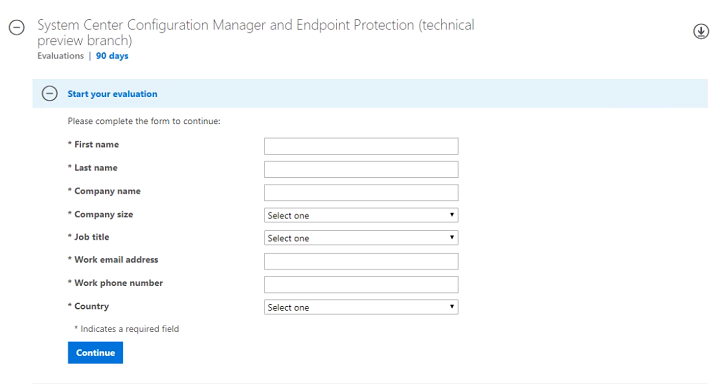
Download - On the host system, download the Technical Preview.
-
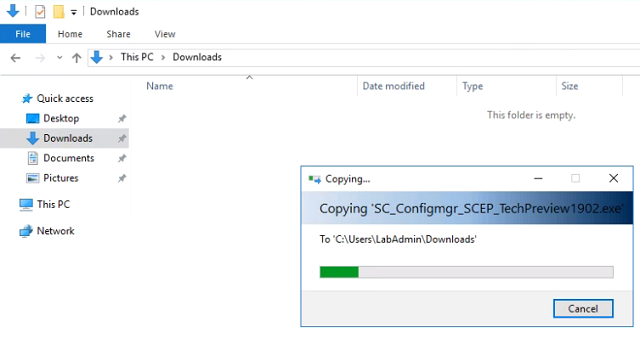
Right click the tech preview installer, select Copy.
-
On HYD-CM1, navigate to the Downloads folder and paste the file.
-
Launch the tech preview installer, click Unzip. It will extract the files to the root of C:\.
-
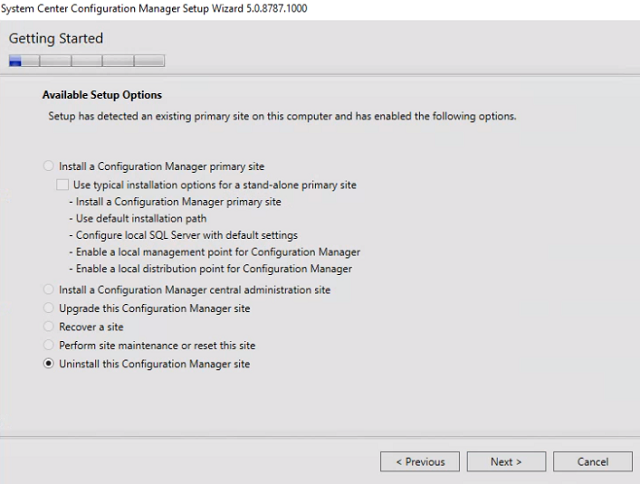
Uninstall Current Branch - Navigate to C:\SC_Configmgr_SCEP_TechPreview1902\SMSSETUP\BIN\X64, right click setup.exe, select Run as administrator.
-
When the System Center Configuration Manager Setup Wizard launches, click Next. At the Available Setup Options screen, the only option available is Uninstall this Configuration Manager site. Click Next. Leave default options, continue clicking Next, and accept any prompts to confirm uninstallation. Reboot HYD-CM1.
-
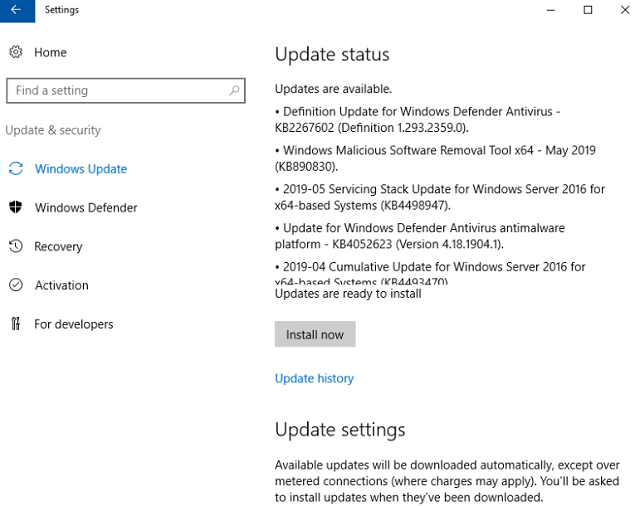
Patch - The installer will fail if there are pending reboots. Open Windows Update, check for and install updates. Reboot HYD-CM1.
-
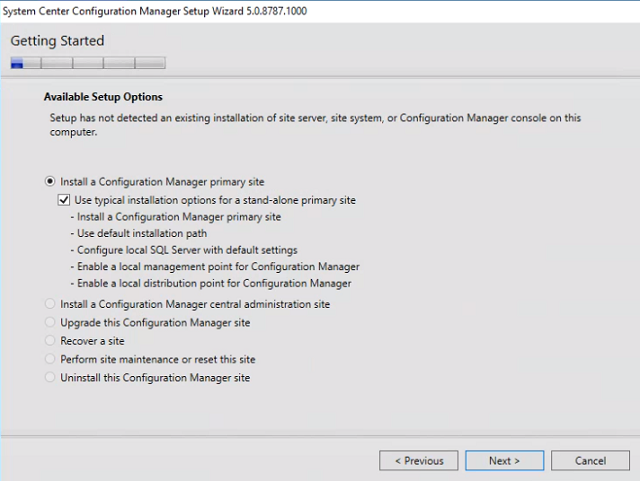
Install - Navigate to C:\SC_Configmgr_SCEP_TechPreview1902\SMSSETUP\BIN\X64 again. Right click setup.exe, select Run as administrator.
-
When the System Center Configuration Manager Setup Wizard opens, click Next. This time at the Available Setup Options screen, check the box for Use typical installation options for a stand-alone primary site. Click Next.
-
At the Product License Terms screen, check all the license agreements boxes and click Next.
-
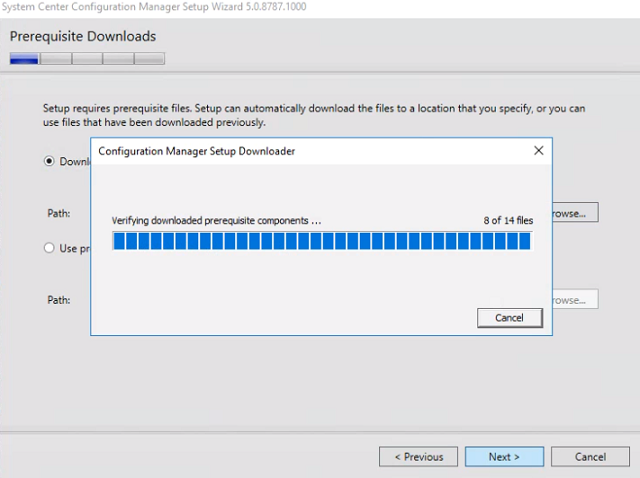
Leave the default Download required files option, and click Browse. Choose the Downloads folder and click OK. Click Next.
-
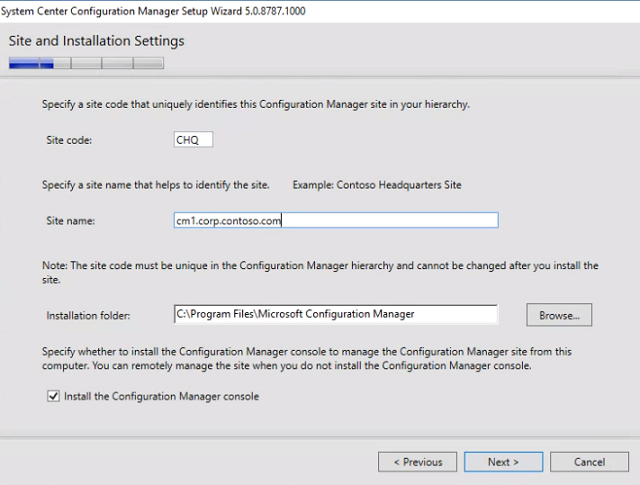
At the Site and Installation Settings screen, set the site code to CHQ. Set the site name to cm1.corp.contoso.com. Leave everything else and click Next.
-
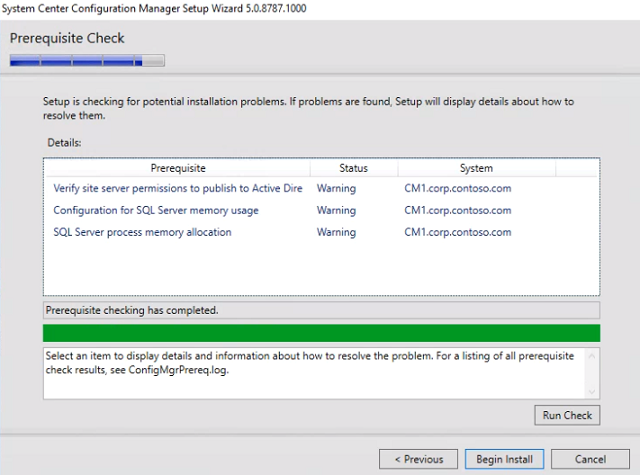
Continue accepting defaults and click Next until the prequisite check finishes. Ignore any warnings and click Begin Install.
-
When the installation completes, click Close.

The Finishing Touch
Now that we’ve got a functioning domain, SCCM server, and internet access, it’s time to update.
-
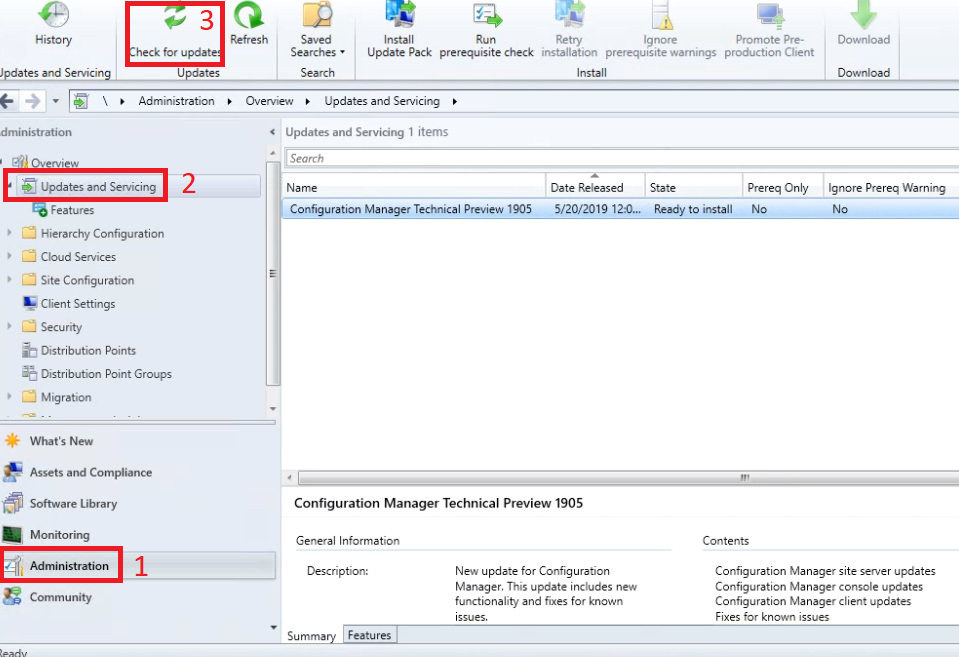
On HYD-CM1, launch the SCCM console. Navigate to the Administration node and select Updates and Servicing. Click on Check for updates.
-
If the latest version hasn’t already started downloading, select it (in this case 1902), right click and choose Download.
-
Once it is downloading, on the bottom pane click on the Show Status link.
-
On the Updates and Servicing Status page for our chosen update, right click update package and choose Show Status again.
-
From here, we can follow the download AND installation statuses of the latest SCCM upgrade.
-
Once the download is complete, go back to the Administration node and click on Updates and Servicing again. The update we downloaded should now say Ready to install.
-
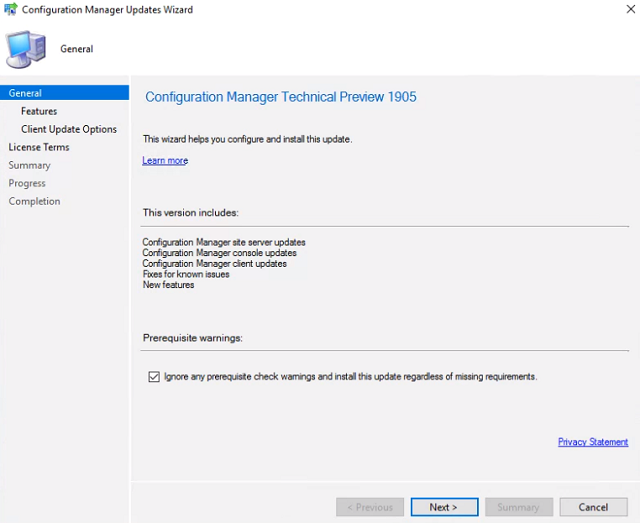
Update - Right click the update and select Install Update Pack. Check Ignore any prerequisite check warnings… and click Next.
-
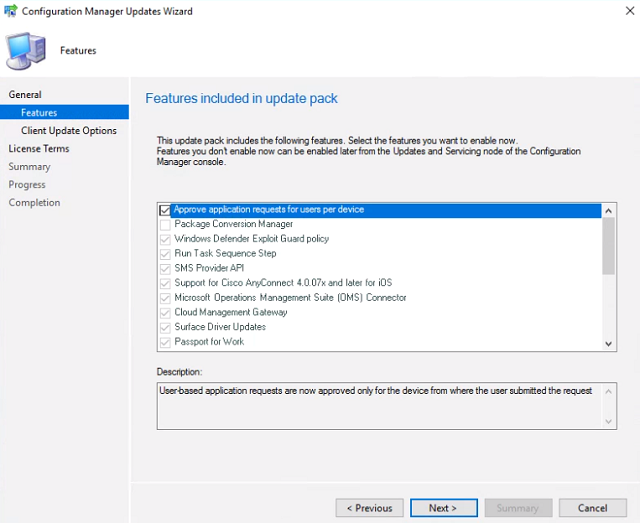
At the Features included in update pack screen, check all available options and click Next until we reach the License Terms. Check the box, and keep clicking Next until the wizard completes successfully. Click Close.
-
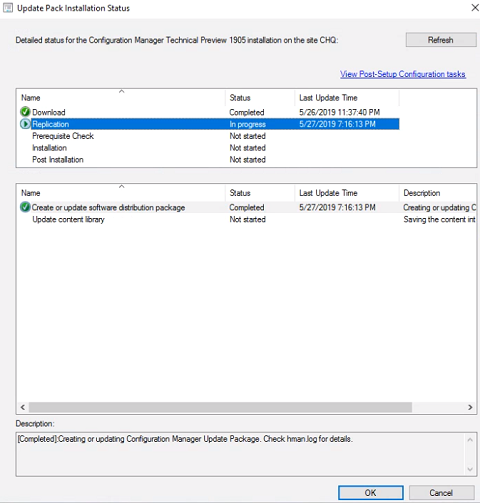
Repeat steps 3 and 4 and watch the update installation progress. Refresh until the Update Wizard is complete and click Close.
-
Close the SCCM console and relaunch it. We will be prompted to upgrade the console to the new version. Click OK, and if prompted for elevation click OK again.
Congratulations! We now have a functional SCCM tech preview environment we can configure and customize.
Next up - Operating System Deployment over PXE