Patching with SCCM and WSUS
An essential function of SCCM is deploying patches and providing compliance reporting around that patching.
The Overview
- Prepare our environment for WSUS
- Install WSUS
- Configure SCCM
- Optimize updates
- Set up an automatic deployment rule
- Examine update compliance reports
The Sources
- Rich Mawdsley’s three-part series for configuring WSUS is my defacto guide for initial setup. This post is honestly just going to be 99% shamelessly stealing Part 1 with minor customizations.
- Justin Chalfant’s WSUS maintenance guide has a terrific step-by-step video and the definitive list of WSUS maintenance resource links.
- Bryan Dam’s “Software Update Maintenance” script is necessary for maintaining an efficient set of updates. It can be automated to remove/expire update metadata that our environment will never need, but otherwise clogs up and drastically slows down the patch scanning process.
Prepare the environment
Expand the Server
DISCLAIMER: It is not considered best practice to install SCCM or keep any content on the C: drive. However that is how the 365 Powered Device Lab is set up by default, so we need to increase the amount of disk space to make room for WSUS.
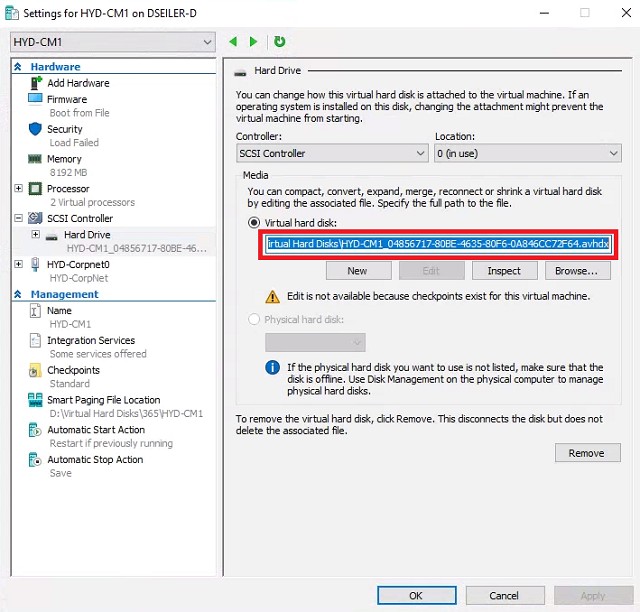
- Launch Hyper-V. Right-click HYD-CM1 and select Settings.
-
Select Hard Drive. Copy the path to the Virtual hard disk. Click Cancel.
-
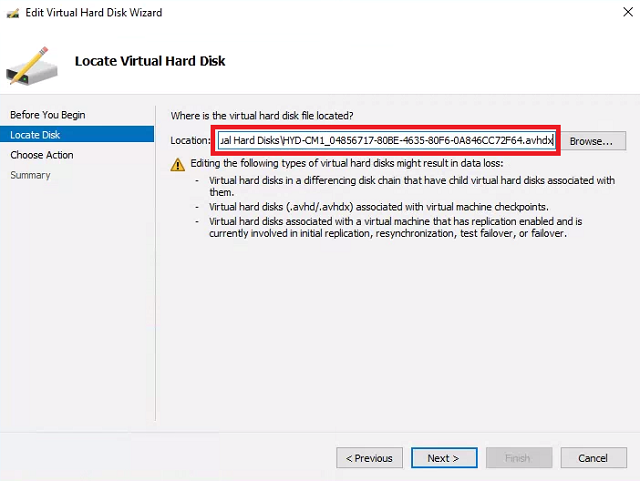
Click Edit Disk. At the Before you Begin screen click Next. Paste the path to the HYD-CM1 disk. Click Next.
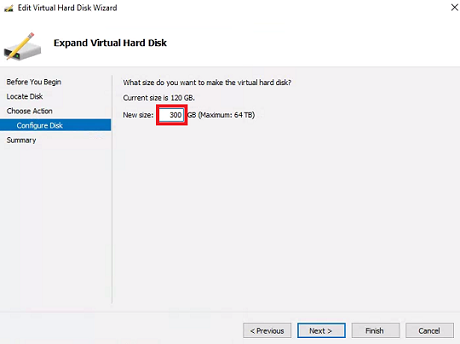
- Choose Expand and click Next.
-
Set New size to 300 or so and click Next. Click Finish.
- Connect to HYD-CM1. Launch the Create and format hard disk partitions control panel.
- Click Action and choose Rescan disks.
-
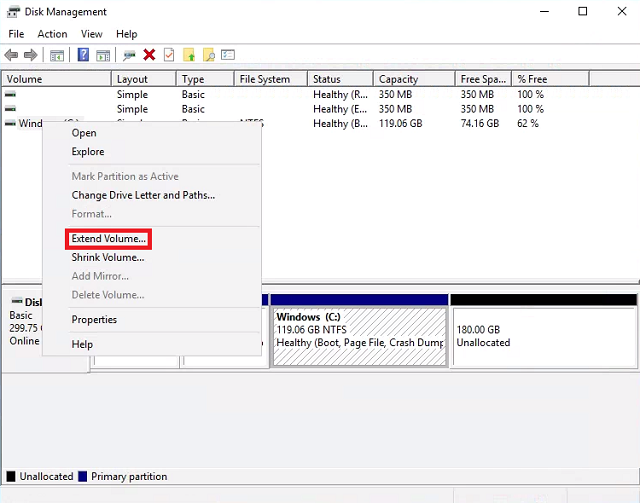
Right-click Windows (C:) and choose Extend Volume. Click Next.
-
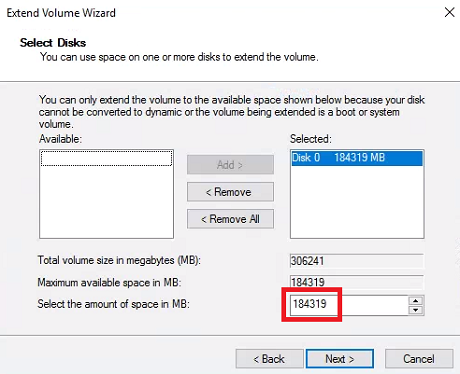
The wizard should already have the amount at it’s maximum. Click Next then click Finish.
Update Group Policy
We need to inform our systems that they will check for updates from WSUS/SCCM. Since it’s a lab we’ll just use the built-in Default Domain Policy.
- Log into the domain controller HYD-DC1.
- Launch Group Policy Management.
- Expand Domains -> corp.contoso.com.
-
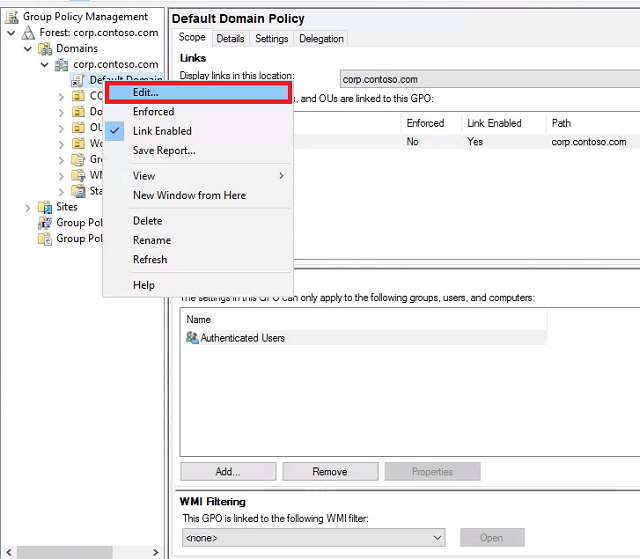
Right-click Default Domain Policy and select Edit.
-
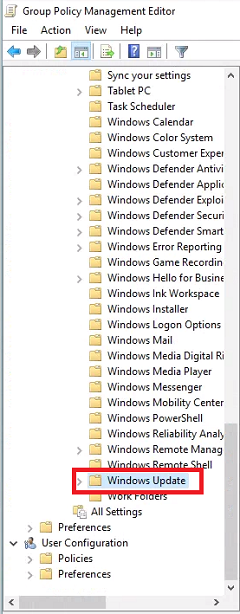
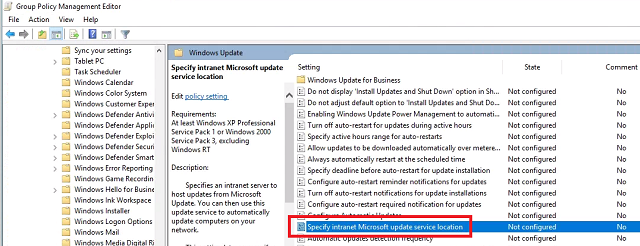
Expand Computer Configuration -> Policies -> Administrative Templates, Windows Components -> Windows Update.
-
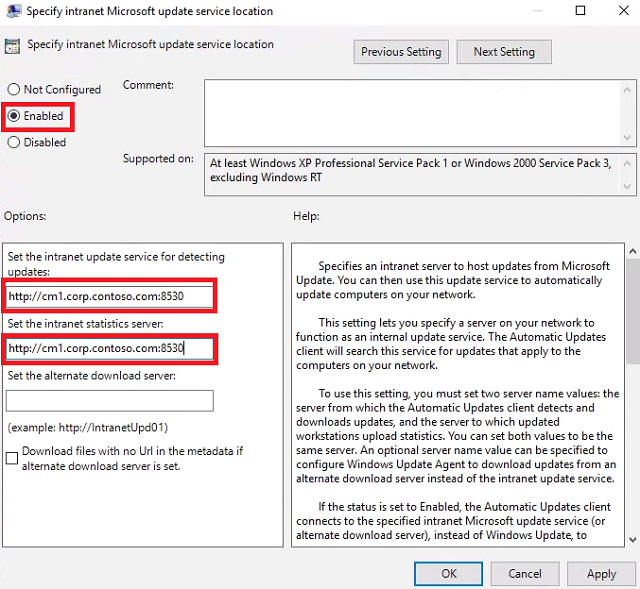
Double-click Specify intranet Microsoft update service location and set it to Enabled. For Set the intnranet update service for detecting updates and Set the intranet statistics server enter http://cm1.corp.contoso.com:8530 and click OK.
-
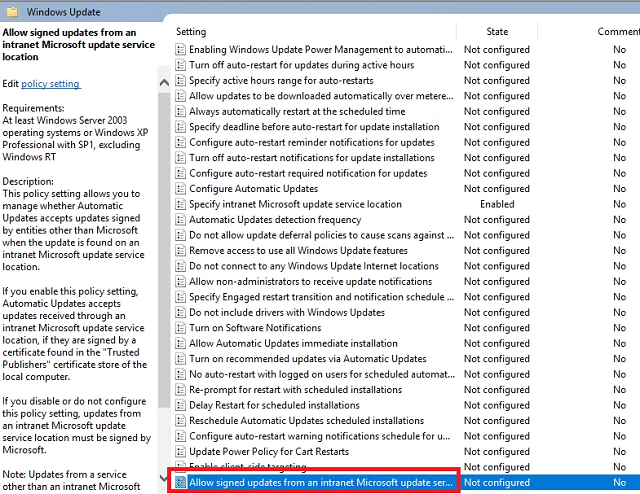
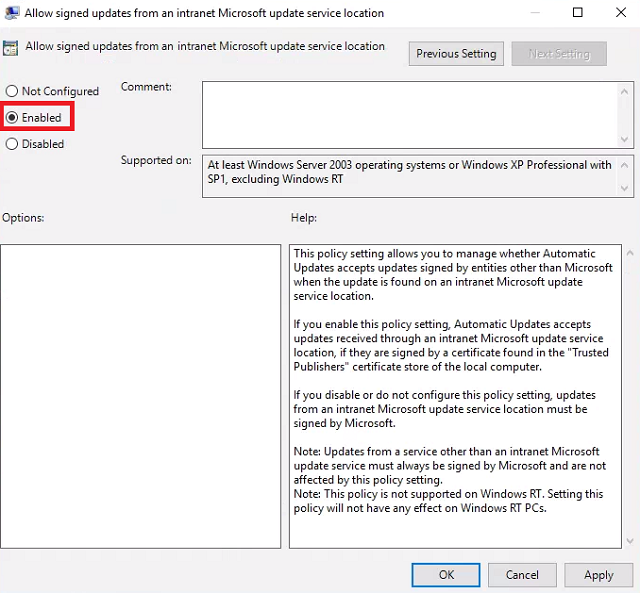
Double-click Allow signed updates from an intranet Microsoft update service location and set it to Enabled. This will allow us to deploy third party updates later if we want. Click OK.
- Close the Group Policy Management Editor.
Install WSUS
The default WSUS configuration in the 365 Powered Device Lab needs to be redone
Remove Roles and Features
-
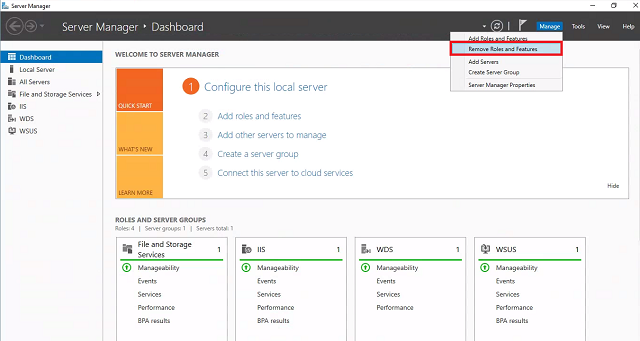
Connect to HYD-CM1 and launch Server Manager. Click Manage and select Remove Roles and Features.
- If the Before you begin screen comes up first, click Next.
-
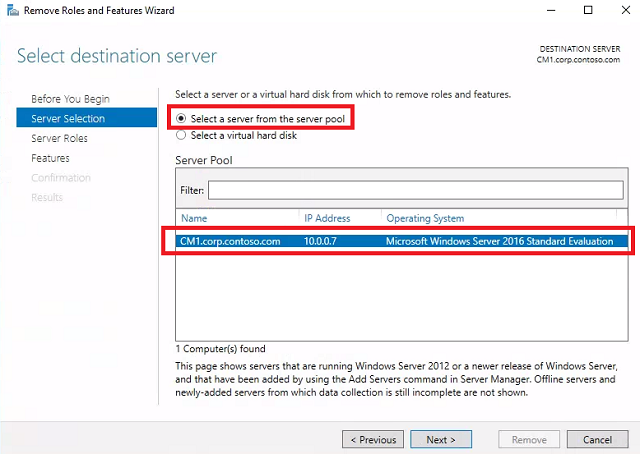
Server Selection - Leave CM1.corp.contoso.com selected and click Next.
-
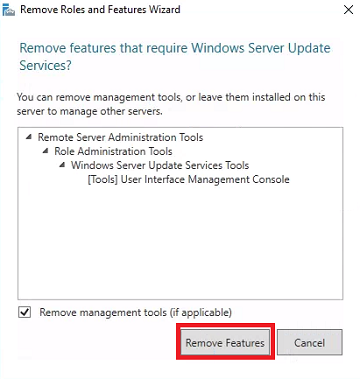
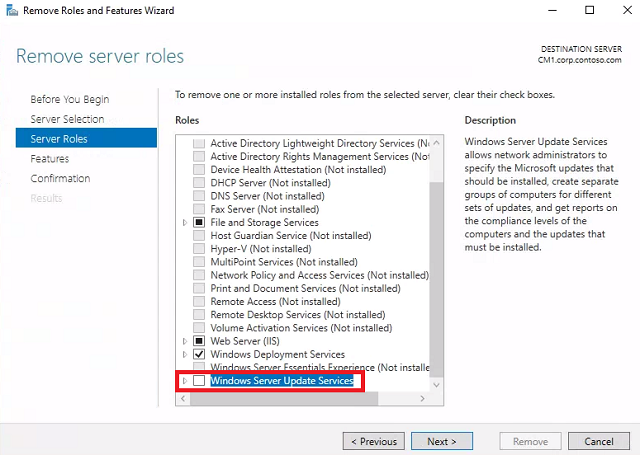
Remove server roles - Uncheck Windows Server Update Services. When the Remove Roles and Features Wizard pops up, click Remove Features. Click Next.
-
Remove features - Don’t make any changes. Click Next. Click Remove.
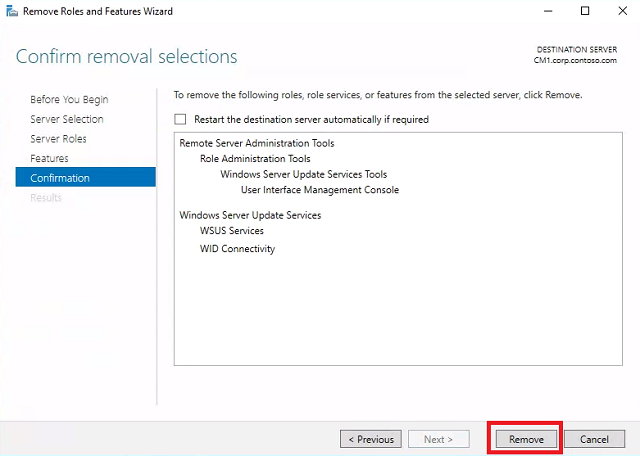
-
Wait for removal to succeed and click Close.
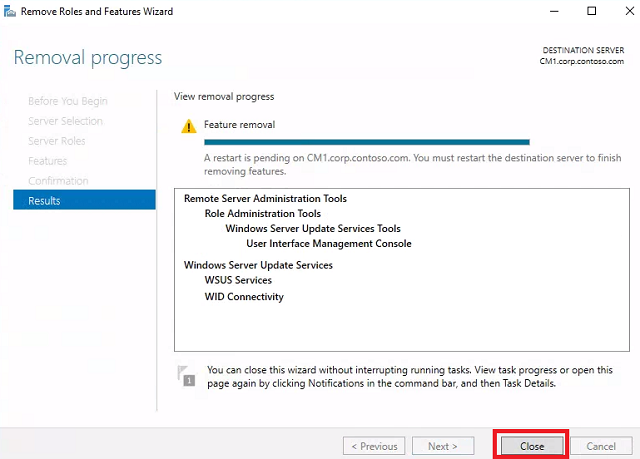
- Reboot HYD-CM1.
Add Roles and Features
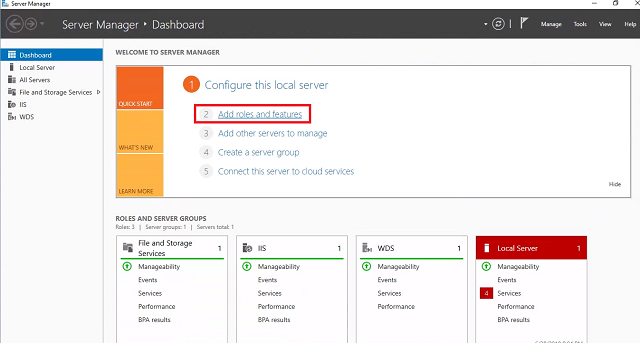
-
Log into HYD-CM1 and launch Server Manager. Click Add roles and features. If the Before you begin screen comes up first, click Next.
- Installation Type - Select Role-based or feature-based installation and click Next.
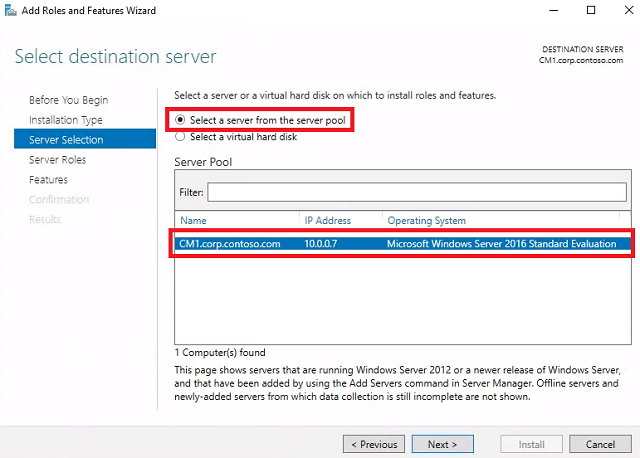
-
Leave CM1.corp.contoso.com selected and click Next.
-
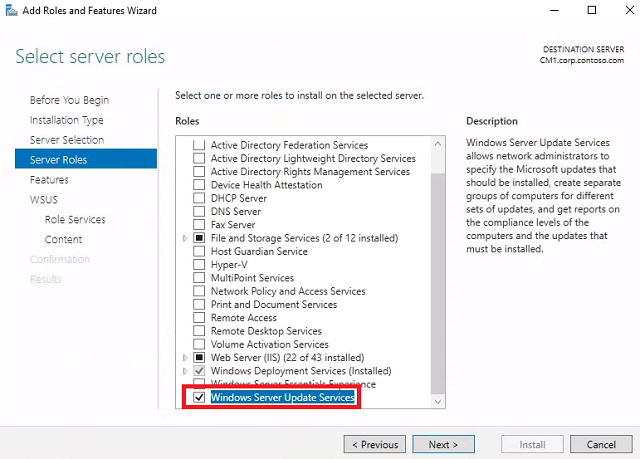
Select server roles - Check Windows Server Update Services. When the Add Roles and Features Wizard pops up, click Add Features. Click Next.

-
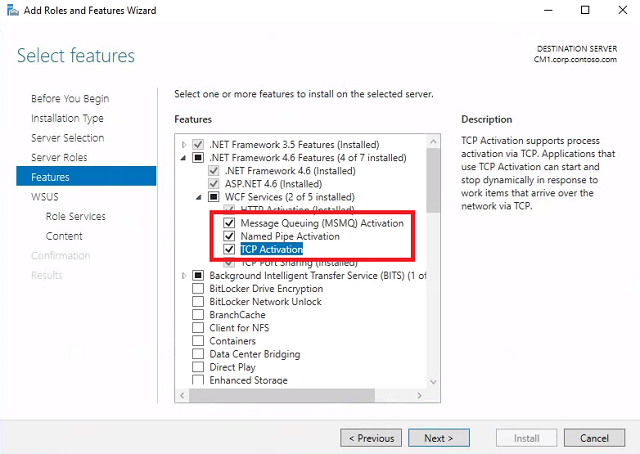
Select features - Expand .NET Framework 4.6 Features, expand WCF Services, and check all features. For any wizards that pop up, click Add Features. Click Next, and click Next again.
-
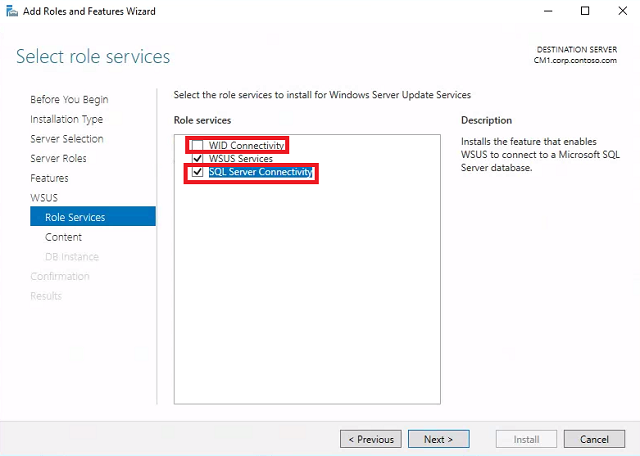
Select role services - Uncheck WID Connectivity and check SQL Server Connectivity. Click Next.
-
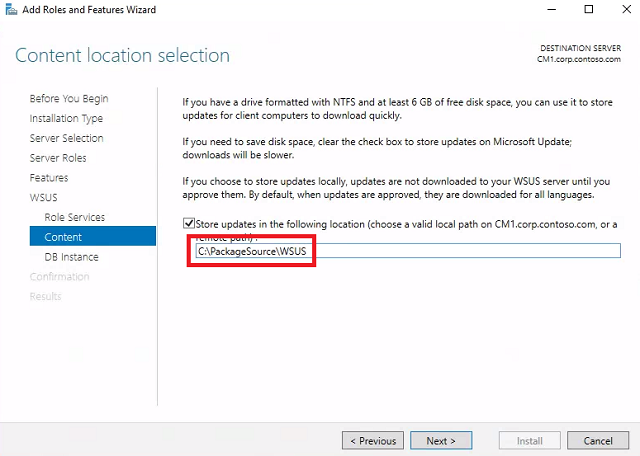
Content location selection - Leave Store updates in the following location checked, and paste C:\PackageSource\WSUS. Click Next.
-
Database instance selection - Type CM1.CORP.CONTOSO.COM and click Check connection. Click Next.

-
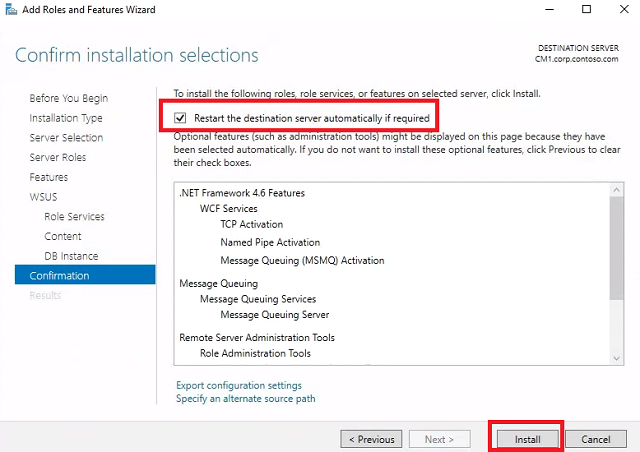
At the confirmation screen, check Restart the destination server automatically if required and click Install.
-
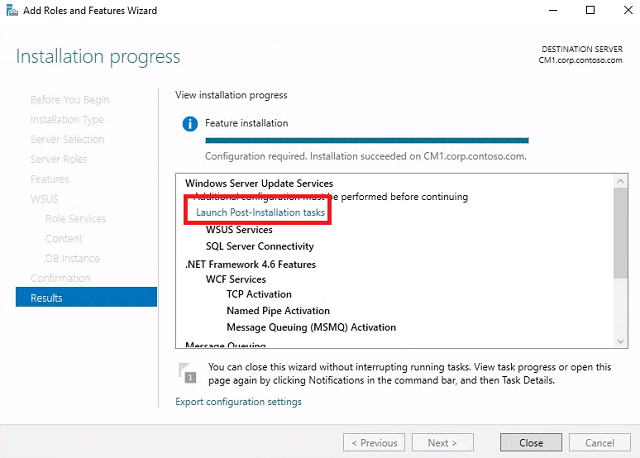
Wait for the installation to succeed and click Launch Post-Installation tasks.
-
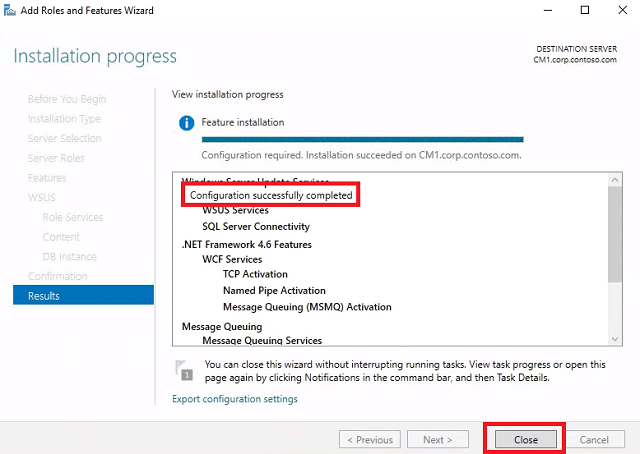
Wait for configuration to successfuly complete and click Close.
- Reboot HYD-CM1.
Configure WSUS
Rich’s guide will do a partial set up and then cancel setup. The goal is to speed up the SCCM sync and reduce metadata.
- Connect to HYD-CM1 and launch Windows Server Update Services.
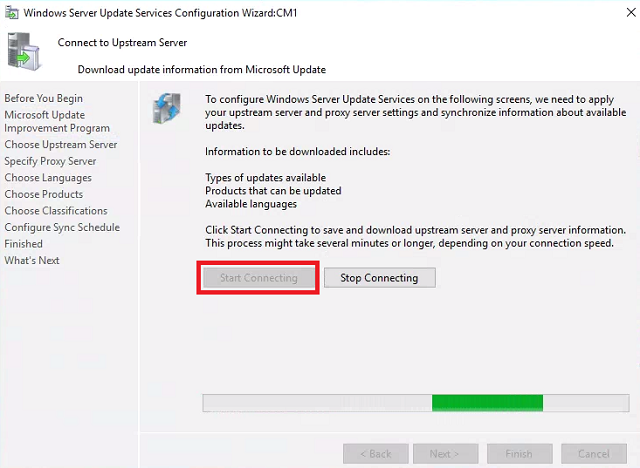
- When the Windows Sever Update Services Configuration Wizard launches, click Next until you reach Connect to Upstream Server.
-
Connect to Upstream Server - Click Start Connecting. When it completes, click Next.
-
Choose Languages - Select Download updates in all languages, including new languages and click Next.

- Choose Products - Leave the defaults and click Next.
-
Choose Classifications - Click Cancel to abort set up. We’ll finish configuration from within SCCM. Close the Update Services console.

Folder and Share permissions
The script we used from Odd-Magne in the OSD guide sets the permissions on our WSUS folder. If you’ve performed that setup you can skip this step.
- If the network access account and NETWORK SERVICE account do not yet have permission to C:\PackageSource\WSUS, continue with the rest of the steps.
- Log into HYD-CM1 and launch Windows Powershell ISE as administrator. Paste the following code into the top script pane. It’s a truncated and modified version of Odd-Magne’s package source script.
 #Set the Following Parameters
 $Source = 'C:\PackageSource'
 $ShareName = 'PackageSource'
 $NetworkAccount = 'CORP\CM_NetAcc'

 #Create SCCMDeploymentPackages Directory
 New-Item -ItemType Directory -Path "$Source\WSUS\SCCMDeploymentPackages"

 #Create the Share and Permissions
 New-SmbShare -Name "SCCMDeploymentPackages” -Path "$Source\WSUS\SCCMDeploymentPackages" -CachingMode None -FullAccess $NetworkAccount,"NETWORK SERVICE"

 #Set Security Permissions
 $Acl = Get-Acl "$Source\WSUS"
 $Ar = New-Object System.Security.AccessControl.FileSystemAccessRule("$NetworkAccount","FullControl", "ContainerInherit, ObjectInherit", "None", "Allow")
 $Acl.SetAccessRule($Ar)
 Set-Acl "$Source\WSUS" $Acl

 $Acl = Get-Acl "$Source\WSUS"
 $Ar = New-Object System.Security.AccessControl.FileSystemAccessRule("NETWORK SERVICE","FullControl", "ContainerInherit, ObjectInherit", "None", "Allow")
 $Acl.SetAccessRule($Ar)
 Set-Acl "$Source\WSUS" $Acl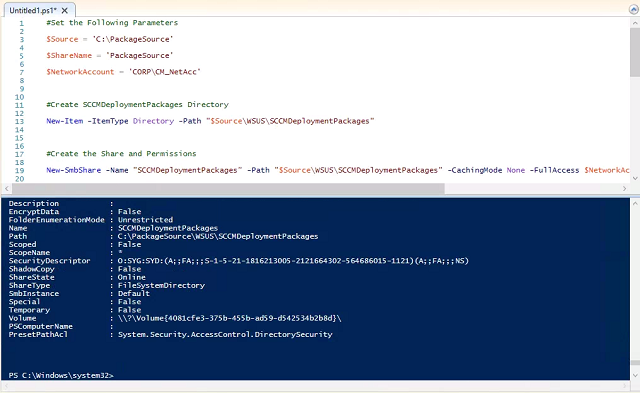
Configure IIS
Microsoft recommends modifying the IIS application pool for WSUS when used with a Software Update Point.
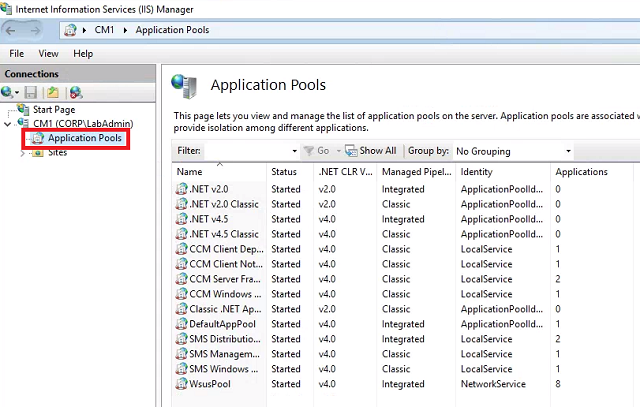
- Connect to HYD-CM1 and launch the Internet Information Services (IIS) Manager.
-
Expand CM1 and select Application Pools.
-
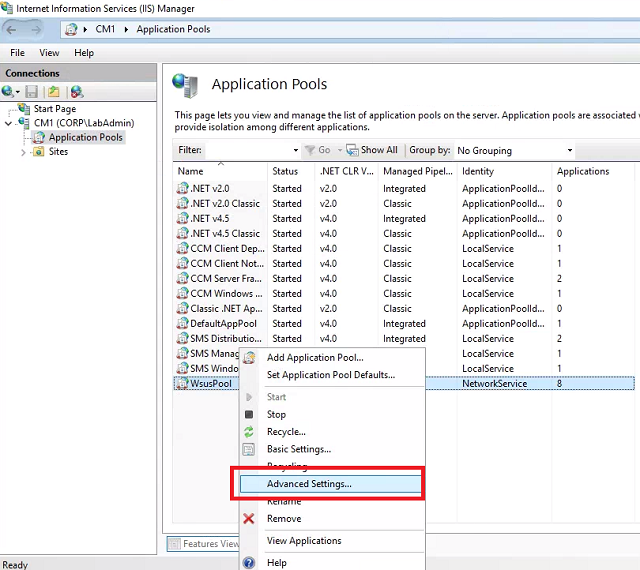
Right-click WsusPool and select Advanced Settings.
-
Set Queue Length to 2000 and set Private Memory Limit (KB) to 0.
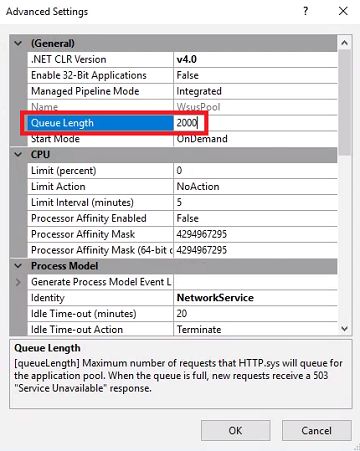
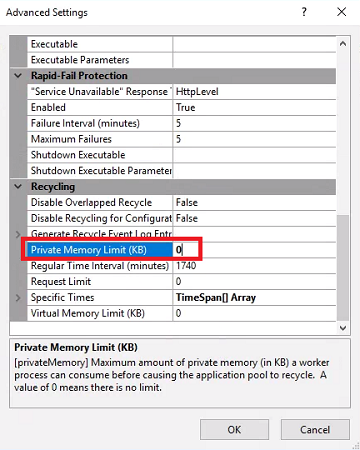
- Click OK and reboot HYD-CM1.
Configure SCCM
The Software Update Point
The 365 Powered Device Lab already has the Software Update Point role installed, so we just need to configure it.
- Connect to HYD-CM1 and launch the Configuration Manager Console.
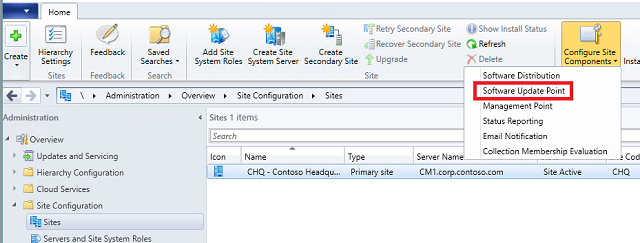
- Expand Administration -> Site Configuration, and select the Sites node.
-
Select CHQ - Constoso Headquarters and click the Configure Site Components dropdown from the ribbon. Select Software Update Point.
-
Classifications tab - Select everything except Feature Updates, Tools, and Upgrades.
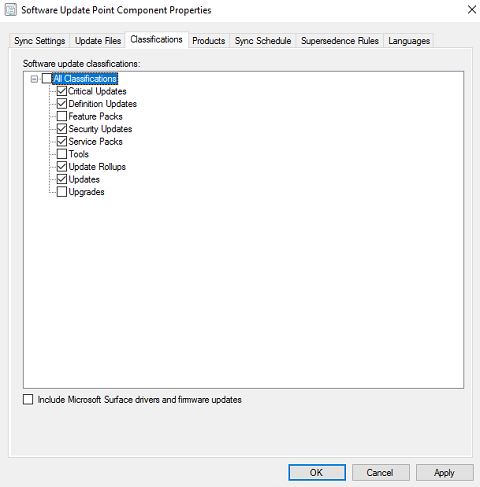
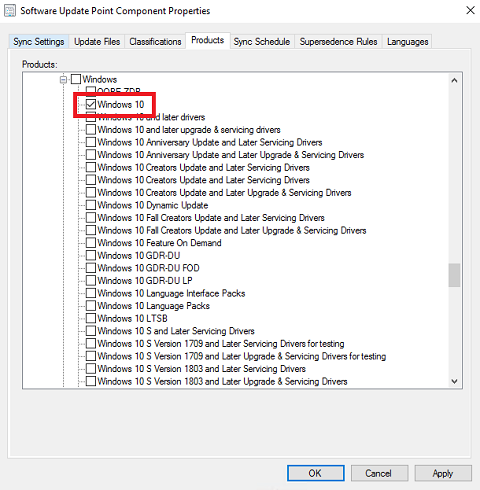
-
Products tab - Uncheck everything, then check Windows 10.
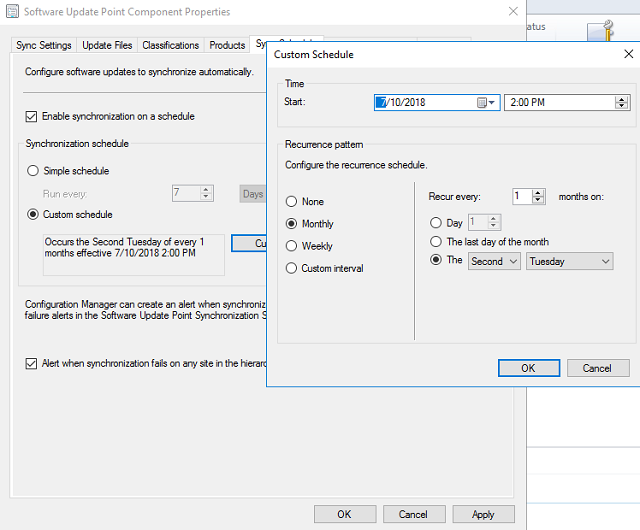
- Sync Schedule tab - Check Enable synchroniztion on a schedule and select Custom schedule. Click Customize.
-
On the Custom Schedule page, select: Monthly, Recur every 1 months on, and The Second Tuesday. Set the Start time to something after noon, say 2:00 PM. Remember this for later when we schedule the cleanup script. Click OK.
- Check Alert when synchronization fails on any site in the hierarchy.
-
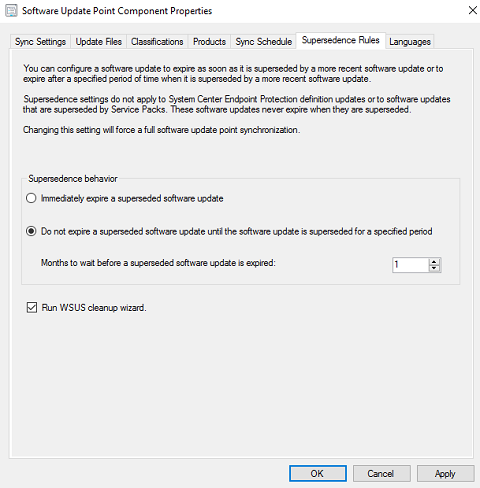
Supersedence Rules tab - Set Months to wait before a superseded software update is expired to 1. Check Run WSUS cleanup wizard.
-
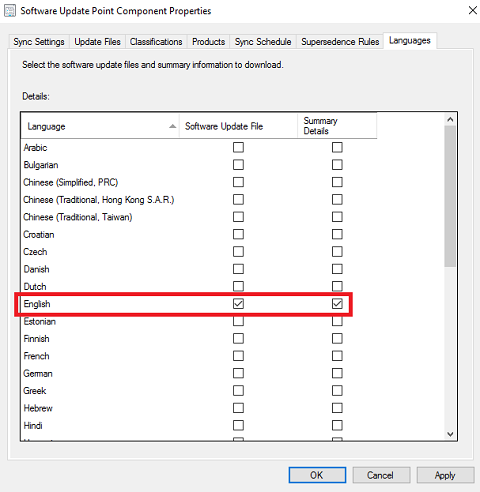
Languages tab - Uncheck everything except English for both columns. Click OK.
Synchronize Software Updates
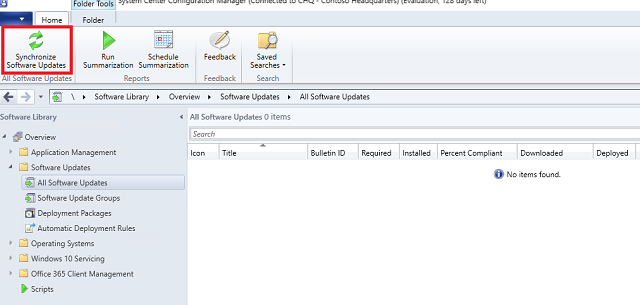
- In the SCCM console, expand the Software Library -> Software Updates node.
-
Select All Software Updates and click the Synchronize Software Updates button in the ribbon. Click Yes.
-
Navigate to the Monitoring -> Software Update Points Synchronization Status node. Look at the fields in the bottom pane, and wait for the Synchronization Status to change to Completed.
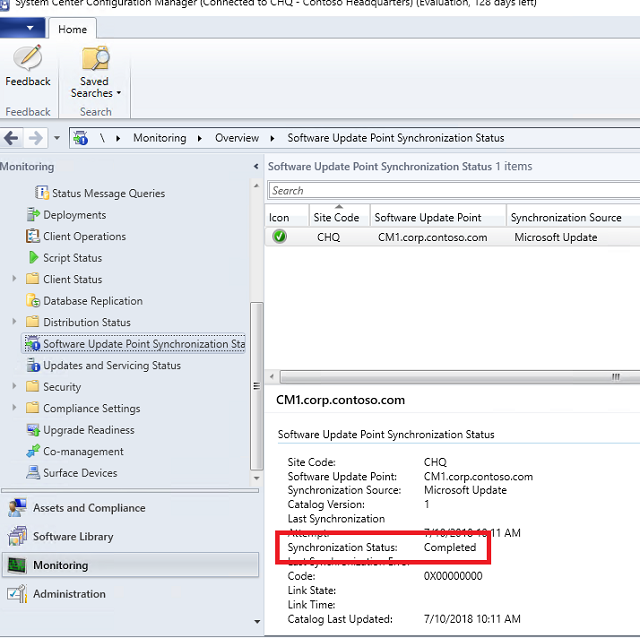
- Alternatively, you can open “C:\Program Files\Microsoft Configuration Manager\Logs\wsyncmgr.log” in CMTrace and monitor progress.
-
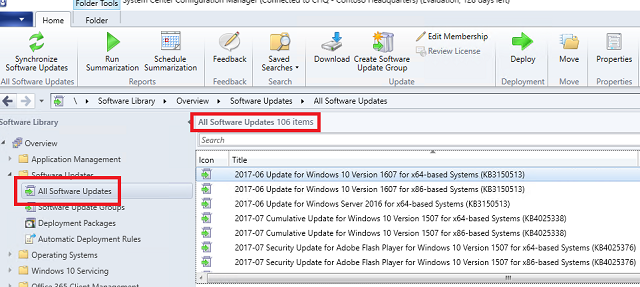
Once complete, navigate to the Software Library -> Software Updates -> All Software Updates node. It should now be full of patches.
Optimize WSUS
Justin did a great write up on optimizing WSUS, including the set up for Bryan’s cleanup script. We’re JUST going to focus on configuring and scheduling the cleanup.
Configure the script
- On HYD-CM1, download Bryan Dam’s Software Update Maintenance Script.
-
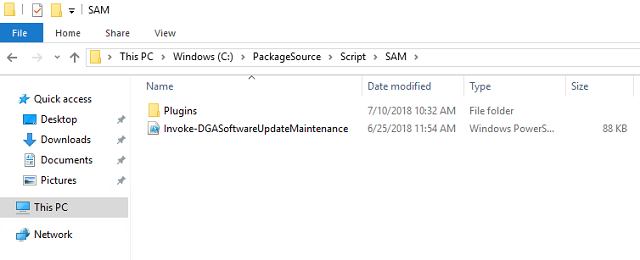
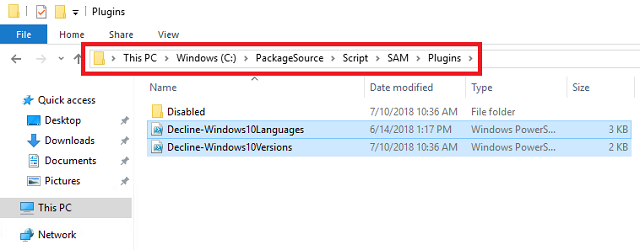
Create a folder in C:\PackageSource\Script called SAM. Extract the script and plugins folder to C:\PackageSource\Script\SAM.
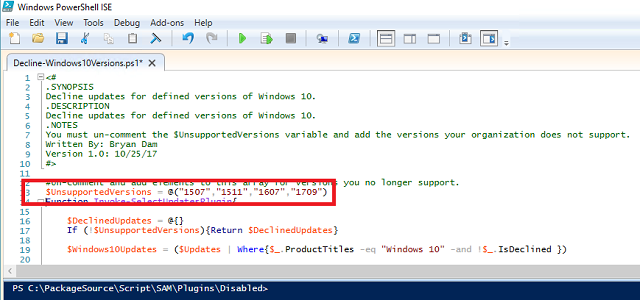
- Navigate to C:\PackageSource\Script\SAM\Plugins\Disabled. Right-click Decline-Windows10Versions.ps1 and choose Edit so it opens in PowerShell ISE.
- Un-comment (remove the #) before UnsupportedVersions = @(“1511”).
-
Add all versions we do NOT want to support. Since I’m deploying 1703 in the lab with the plans to upgrade to 1803 (or later), mine would look like $UnsupportedVersions = @(“1507”,”1511”,”1607”,”1709”). Save the script and close PowerShell ISE.
-
Move the Decline-Windows10Versions.ps1 and Decline-Windows10Languages.ps1 scripts out of the Disabled folder and into the root Plugins folder.
Schedule the script
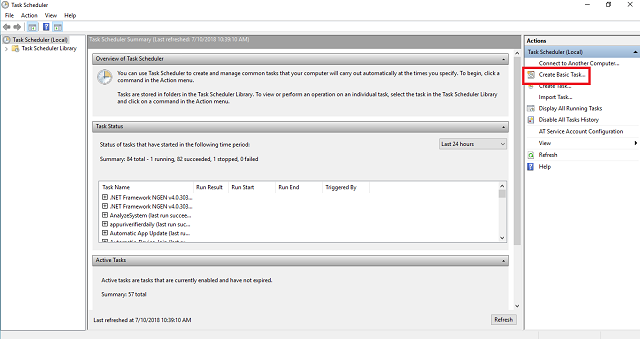
- On HYD-CM1, launch Task Scheduler.
-
Click Create Basic Task.
-
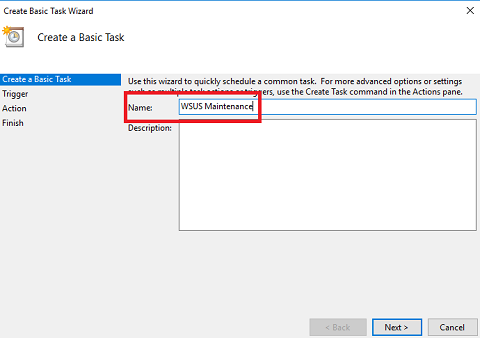
Name it WSUS Maintenance and click Next.
-
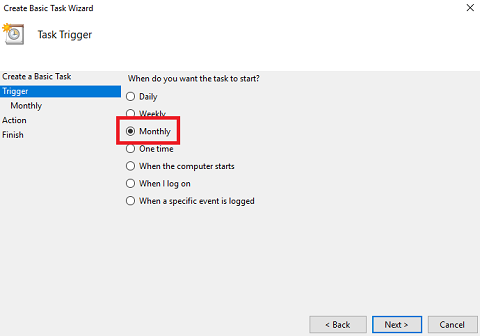
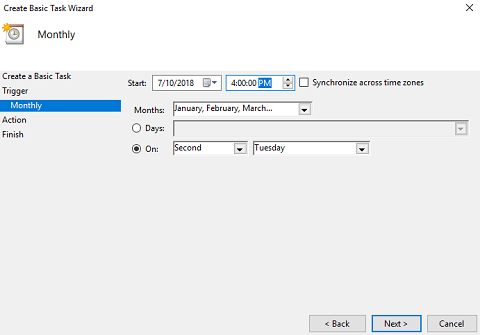
Trigger wizard - Select Monthly and click Next.
-
Monthly wizard - Click the Months dropdown and check Select all months. Select On and set it to Second Tuesday. Set the Start time to two hours after the WSUS sync we set above. In this example, we’ll set the task to run at 4:00 PM. Click Next.
-
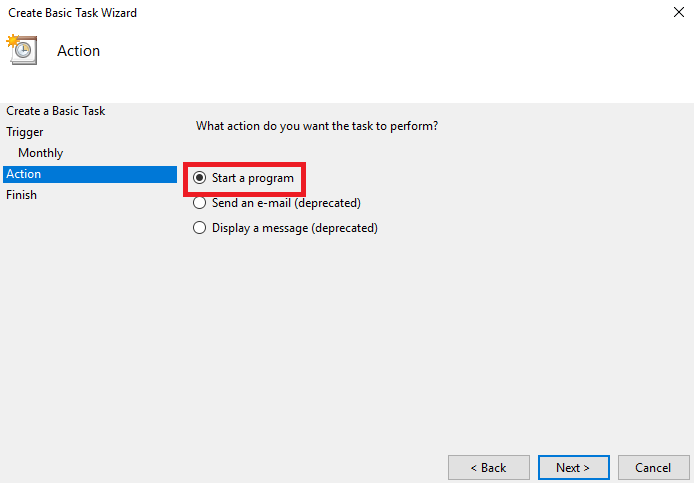
Action wizard - Select Start a program and click Next.
-
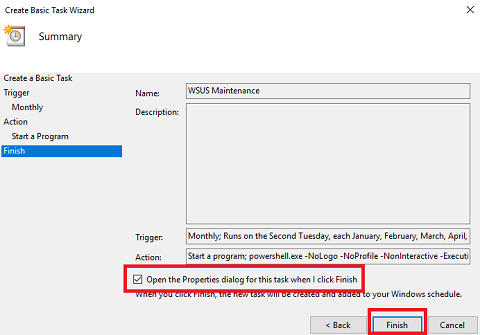
Start a Program wizard - Set Program/Script to powershell.exe. Set Add arguments to -NoLogo -NoProfile -NonInteractive -ExecutionPolicy ByPass -command C:\PackageSource\Script\SAM\Invoke-DGASoftwareUpdateMaintenance.ps1 -DeclineSuperseded -UpdateListOutputFile C:\PackageSource\Logs\DeclinedUpdates.csv -DeclineByTitle @(‘Itanium’,’ia64’,’Beta’) -DeclineByPlugins -CleanSUGs -RemoveEmptySUGs -RunCleanUpWizard -Force and click Next.

-
Finish - Check Open the Properties dialog for this task when I click Finish and click Finish. The WSUS Maintenence Properties screen will open.
-
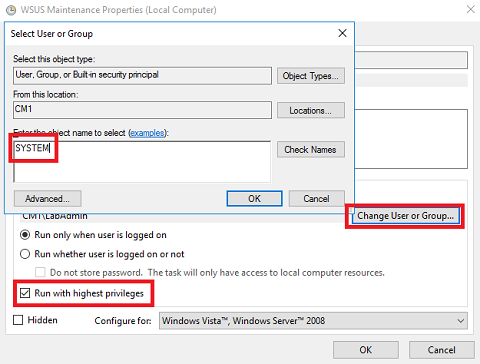
General tab - Click Change User or Group. Type SYSTEM and click OK. Check Run with highest privileges and click OK.
-
Right-click the WSUS Maintenance task we created and select Run.
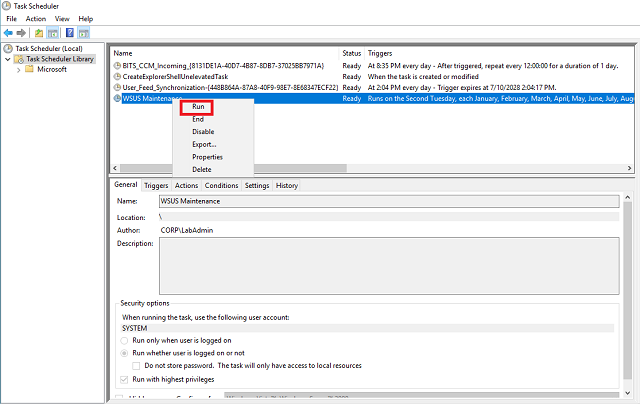
-
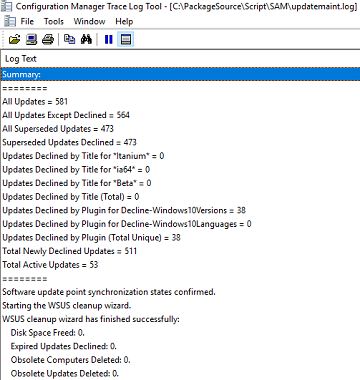
Open C:\PackageSource\Script\SAM\updatemaint.log in CMtrace.exe and watch as the unnecessary updates are declined.
Automatic Deployment Rules
ADRs are the method by which we schedule the creation of a Software Update Group, define the updates for the SUG, and select the collection to which we deploy.
Create the collection
To avoid ever deploying anything to the built-in All Systems collection, we’ll create one for workstations. Anders Rodland has a great list of collection query examples.
- Connect to HYD-CM1 and launch the Configuration Manager Console.
- Navigate to the Assets and Compliance -> Device Collections node.
-
Click Create and select Create Device Collection.
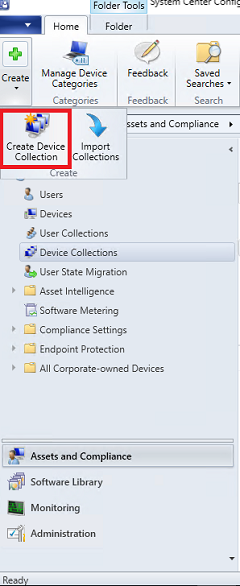
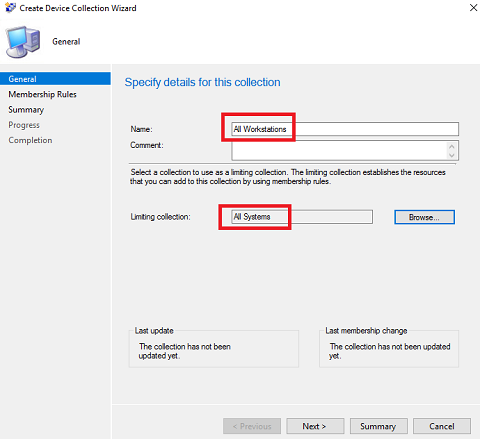
-
In the Create Device collection Wizard, name the collection All Workstations. Set the limiting collection to All Systems and click Next.
-
Membership Rules wizard - click the Add Rule dropdown and select Query Rule.
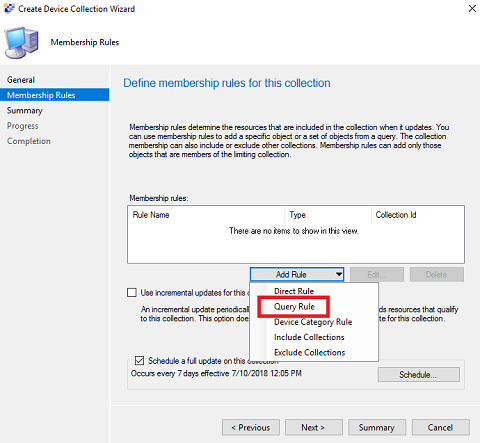
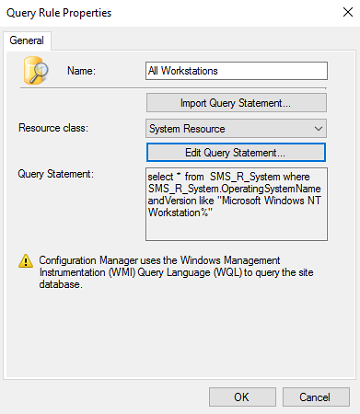
- At the Query Rules Properties screen, set the name to All Workstations and click Edit Query Statement.
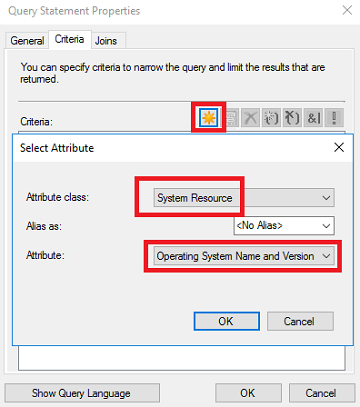
- Criteria tab - On the Criteria tab click the star to add criterion.
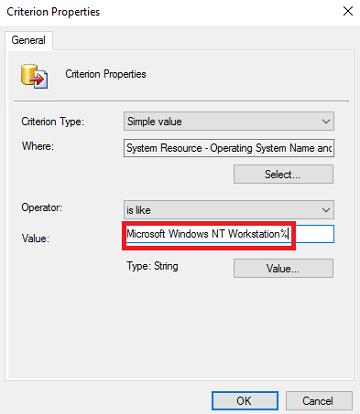
- At the Criterion Propteries screen, leave Criterion Type as Simple value. Click the Select button.
-
Set the Attribute class to System Resource and set the Attribute to Operating System Name and Version. Click OK.
- Set the Operator to is like. Click the Value button.
-
Set the Values to Microsoft Windows NT Workstation% and click OK.
-
Click OK to close the Criterion Properties screen. Click OK again to close the Query Statement Properties screen. Click OK yet again to close the Query Rule Properties screen.
- Check Schedule a full update on this collection and click Schedule.
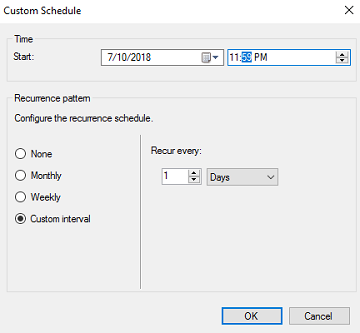
-
Select Custom interval and set it to recur every 1 days. Change the Start time to 11:59 PM. Click OK.
- Click Next. At the Summary screen, click Next. At the Completion screen, click Close.
Create the ADR
- In the Configuration Manager Console, expand the Software Library -> Software Updates node.
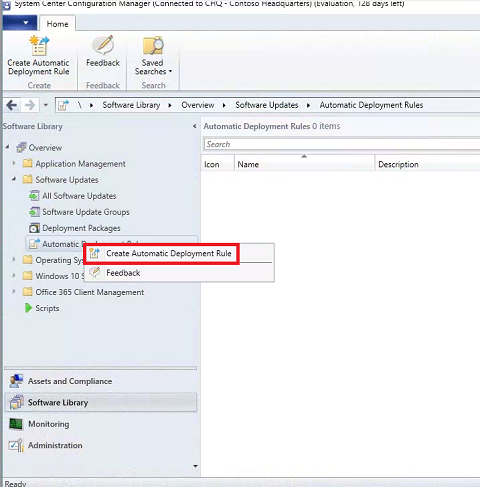
-
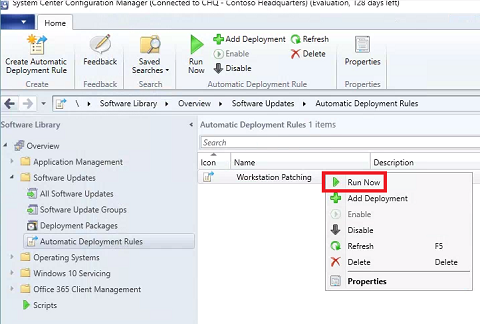
Right-click Automatic Deployment Rules and select Create Automatic Deployment Rule to launch the Create Automatic Deployment Rule Wizard.
-
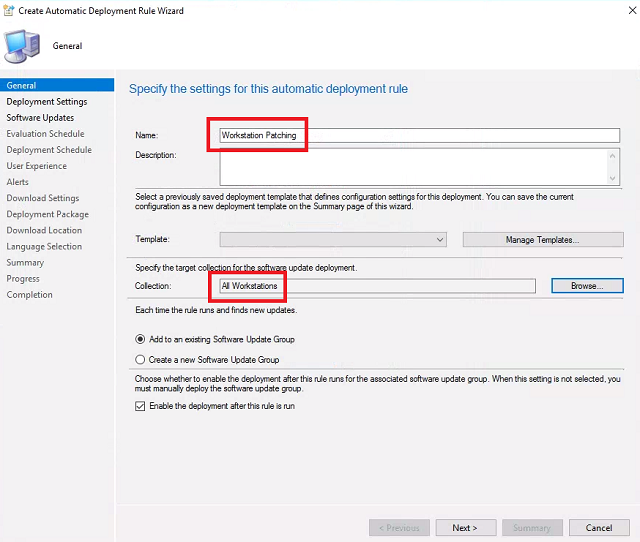
General - Set the name to Workstation Patching. For Collection click Browse select All Workstations and click OK. Leave the rest of the settings default and click Next.
- Deployment Settings - Leave defaults and click Next.
-
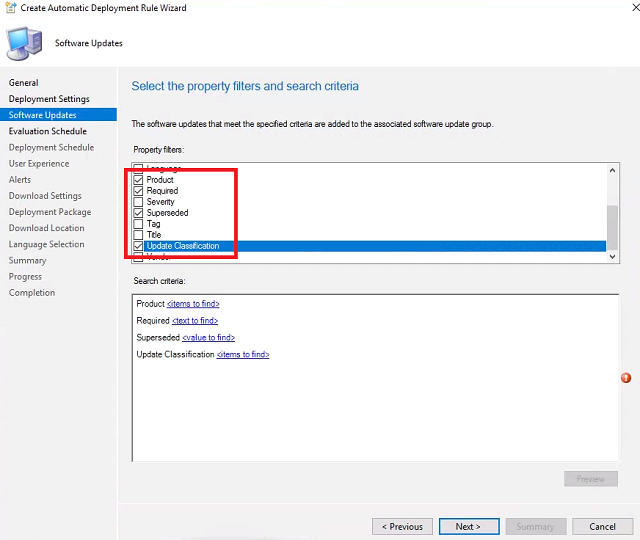
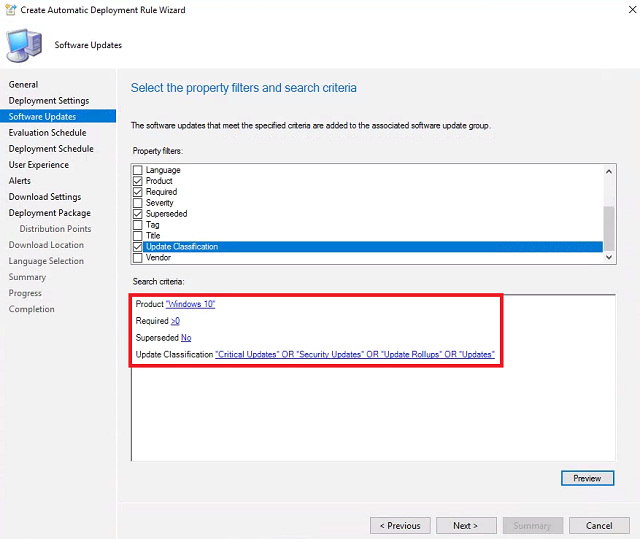
Software Updates - Check Product, Required, Superseded, and Update Classification.
- For Product, click items to find. Check Windows 10 and click OK.
- For Required, click text to find. Type >0 and click Add. Click OK.
- For Superseded, click value to find. Select No and click OK.
-
For Update Classification, click items to find. Check Critical Updates, Security Updates, Update Rollups, and Updates. Click OK. Click Next.
- Evaluation Schedule - Select Run the rule on a schedule. We want to provide time between the SUP sync, the optimization script scheduled task, and the ADR evaluation. Click Customize.
-
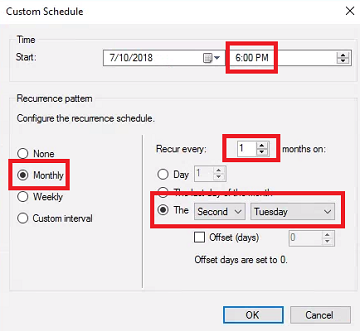
On the Custom Schedule page, select: Monthly, Recur every 1 months on, and The Second Tuesday. We’ve set the WSUS sync to 2:00pm, the script is scheduled for 4:00pm, so we’ll set the Start time to 6:00 PM. Click OK and click Next.
-
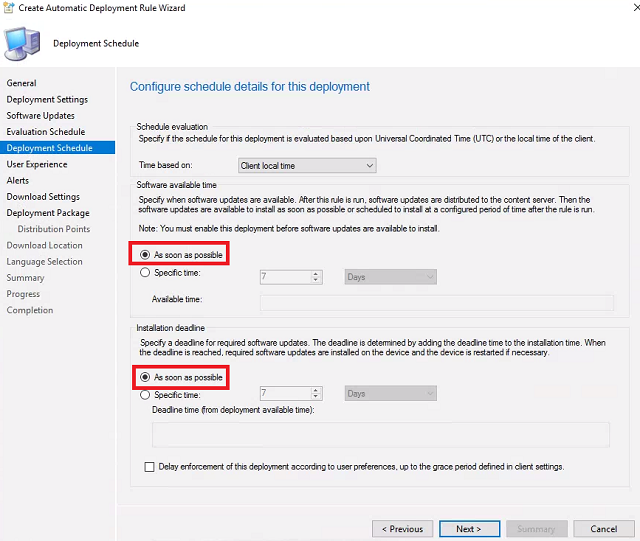
Set Installation deadline to As soon as possible so our patches start deploying immediately. Click Next.
-
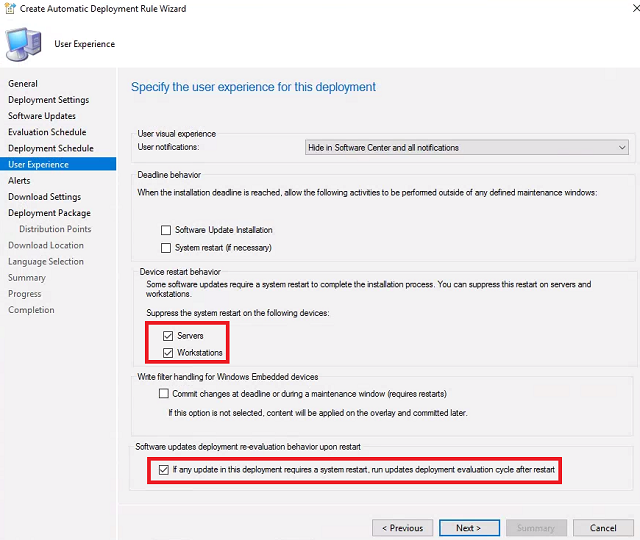
User Experience - For Suppress the system restart on the following devices check Servers and Workstations. Check If any update in this deployment requires a system restart, run updates deployment evaulation cycle after restart. Click Next until you reach the Deployment Package wizard.
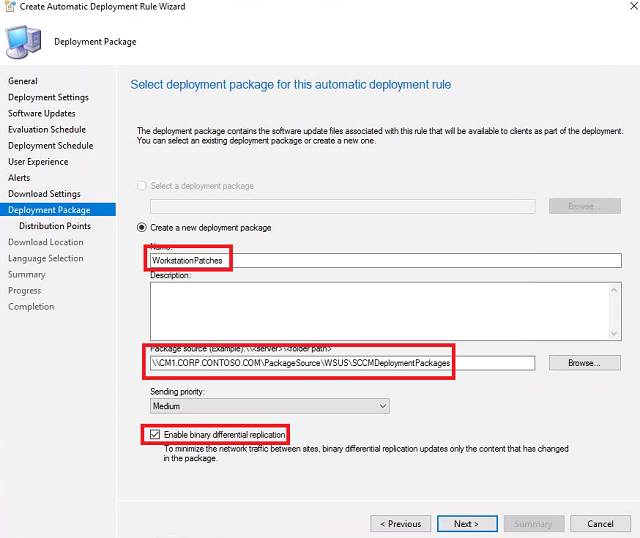
-
Deployment Package - Set the deployment package Name to WorkstationPatches. For Package source click Browse. In the address bar paste \CM1.CORP.CONTOSO.COM\PackageSource\WSUS\SCCMDeploymentPackages and click Select Folder. Check Enable binary differential replication and click Next.
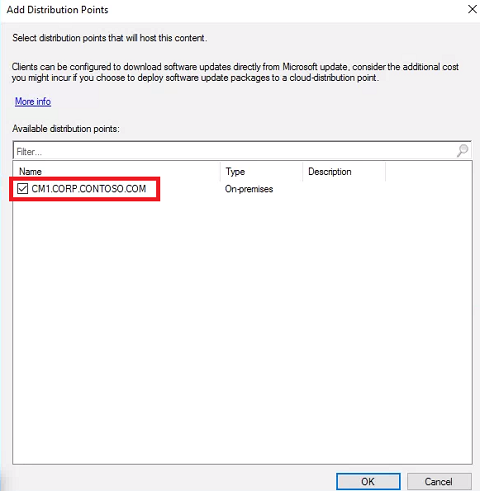
-
Distribution Points - Click Add and select Distribution Point. Check CM1.CORP.CONTOSO.COM and click OK. Click Next.
- Click Next until you reach the Completion screen. Click Close.
-
At this point we’ve already synced WSUS and performed a cleanup using Bryan’s script. Right-click the newly created Workstation Patching ADR and select Run Now.